Beach hair waves with Bumble and Bumble

waves 1I’m someone who really does try to advocate strong healthy hair – hence all the blogs on buns, elegant ponytails and plaits! However, everyonce in a while everyone needs to ‘let their hair down’….so to speak!

I decided to create the beach hair waves – unforutnately, my hair isn’t naturally gorgeous so needs quite a lot of hard work to ironically create a ‘natural look’! However, to try and protect it as much as possible, I’ve used various Ojon and Bumble and Bumble products with the primary goal of protecting whilst styling.

This was the end result:

waves 2

How to create the look

1.) Wash and roughly dry your hair as usual
2.)Remove frizz with a few drops of serum onto dry hair – I love B&B’s Hairdressers Invisible oil as it reduces frizz as well as protecting hair against breakages.
invisible oil

3.)Divide your hair into sections.
4.) Spray the first section of your hair well with a heat protecting styling product (I have reviewed Elnett’s new spray heat protector, which though protects your hair, I found was not good at keeping the style). I therefore HIGHLY reccomend Bumble and Bumble’s ‘spray de mode‘ – this not only protects your hair, but still leaves it soft, smooth and keeps the shapes of your curls
hair spray

5)After spraying your hair, use your GHD’s or curling wand to create lots of small tight ringlets.
6) Continue with the rest of the sections of hair (leaving the fringe)
7)When your done, you’ll have a head full of tight ringlets
8) Here comes the teasing of the ringlets to create that beach hair look: spray a sea salt spray through your hair and gently un-tease all those tight ringlets. (I used Bumble and Bumble’s Surf Spray, especially at the roots to create volume)
surf spray
And there you have it! Some sexy beach waves, ready for any occassion!

Hope you enjoyed

How to make your lips look plumper

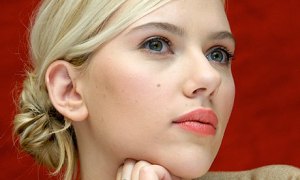
Not all of us are born with the Scarlett Johanson or Angelina Jolie pout.  In fact, when women go to get their lips pumped, these are the two most sought after pouts from the celeb world.  But you need not go to the length of needles and fillers to achieve a gorgeous pout.

Scarlett-Johansson-lips

Those dainty little lips can be transformed with just  a few little tricks of the trade which will go a long way in making the most of what you’ve got.

Take care of your pout

If you’re drawing attention to out pout, make sure that it isn’t cracked.  A good old vaseline does wonders in keeping your lip condition in tip-top check.  Especially now that the cold weather has struck.  For a more intensive balm, Dr Lipp Nipple cream, made of 100%  lanolin oil will really protect those cracks.

Lip Primer

mac lip prime

We’re going to be adding all sorts of liners, lipsticks and glosses so best to make sure that it stays in place.  MACs Prep+ Prime lip not only helps the products go on smoothly but helps them last for hours.  It will make the most of the colours you’re using as well.  Remember to let it go slightly tacky before putting your lip stick on to make sure that it really grips to it well.

Apply a neutral coloured lip liner

no7 nude

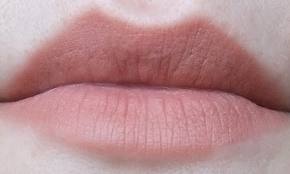
You’ll later be adding a neutral coloured (nude, peachey, coral, rose) lipstick so make sure you choose a lip liner in the same colour but just a tone darker. I find that even cheap brands work wonders – I love no7 nude which is a very delicate natural shade (see picture above).

Don’t over do it. If this is your first time – try very lightly to outline your bottom lip. Use light strokes and make sure it is just a tiny bit outside your natural lip line, giving the impression of making it a bit bigger.  Don’t put too much on the edges of your lips, but in the middle you can afford to go a bit heavier.

When you outline your top lip you need to go a bit lighter as the shape is more difficult.  Outline the same as before, making sure it isn’t heavy at the edges and in the middle of your top lip very carefully outline its shape.

Using the same lip pencil, then blend the colour inwards from the line you have drawn towards your real lip, thus giving it a more natural effect.

*If you have one lip which is much thinner than you’d life you can always exaggerate its size with lip liner.  Be careful though, moderation is key.

Apply a neautral lip stick

Stick to light colours (nudes, light pinks, corals) otherwise dark colours will only draw attention to your lips size.  Also, putting gloss on top of these colours will never look too OTT.

Apply a lip gloss / lip plumper

light pink pout

If you have uneven lips a little gloss on the lip you want to emphasize will work wonders.  Focus the gloss just in the middle of your lips to give the impression of a plumper pout.  Alternatively, a lip plumper also works though the negative is that it does sting quite a bit!  As always, keep to a shade the same colour as your lipstick, or equally a clear works nicely.

And there you have it – a few simple tricks to make the most of your pout and make them absolutely kissable! What tricks do you use?

Fight the elements and smooth your luscious locks

Usually, I’m a bit wary of anti frizz syrums, because they run the risk of turning your freshly washed hair greasy as they’re full of all sorts of strange chemicals.

I stumbled upon this one by chance though; I got it free whilst buying Coppola’s brazilian blowdry set.  I have to say, since using it, it beats every other de-frizzer by miles.  It contains keratin, which infuses keratin protein into your hair follicles.  It therefore repairs the damaged hairs and strengthens  it.  The result: smoother, silkier and more manageable hair.

Application:  

Just a small amount  of this bright pink syrum smoothed into your hair before blow drying it really softens its and smoothes down the frizz.  It leaves no residue and really makes your hair smoother, shiner and most importantly much easier to manage and drag a comb through it.

The retail price is a bit costly at around £30, but instead of throwing away money on high street brands which don’t work, this is definitely an investment.  It’s also huge at a whopping 100 mls.  Mine has lasted over a year now and that’s saying something!

Choosing the right lipstick for your skin tone

Here is a basic guide on choosing the most flattering lip colour shade for your skin-tone.  Though of course you are more than welcome to wear any shade of lipstick / gloss that you like, especially if you’re co-ordinating with your outfit.

Usually different skin tones naturally go better with different shades as they’re on the same colour spectrum.  A bit like looking at the paint colour block  that you get given when your trying to choose what shade of magnolia you’re going to paint your walls.

For Fair Skin

For ladies with lighter skin shades, you’re lips will look great with nude lip tones.  Have a go at choosing a slightly apricot shade, pink or light coral.

Image

These colours add warmth to your pale skin and will keep you looking fresh and bright.  For paler skins, I really like MAC’s Sunny Seoul which is a lovely frosted medium pink.

For Medium Skin

If you’ve got a slightly darker skin tone you can afford to go a bit darker with your lip shades. You’ll look fab in fuscia and  berry tones.

On medium skin tones, a colour such as raspberry will compliment the warmth of your skin.  Bobbi Brown have a great raspberry shade in their Pot Rouge for Lips and Cheeks which, as it says on the tin, can be used as both a cream blush or lip colour.  Its also got a great little mirror for on the road application.  Just be sure to moisturize first if you’re one for dry skin.

For Darker skin shades

Girls with dark skin shades will look great in really strong colours.  I’m talking reds, and purples.  If you’re going for a purple make sure its not too gothic in tone.  As a safe bet, I would recommend red, as it’s so effortlessly chic.

You know as much as I do, that if you’re going to choose a red lipstick shade, Chanel is the first place to look.  They have beautiful collection to choose from with various smouldering reds to choose from.  I like their rouge allure velvet in ‘La Fascinante’. These lipsticks have a great staying power and last all day even without lip primer.

That’s not to say you pale and medium skinned tones girls can’t get away with red (though I would advise you to keep away from the purple hues which may just look too gothic).  This shade looks fab on all skin tones, especially if you’re going for the cat eyed look which is eternally chic and elegant. (see earlier blog on achieving the cat eyed look)

Pink Manicure? Chanel Ballerina is a godsend!

This Autumn is all about soft, warm colours which reflect the soft and neutral colours.  A soft, semi-sheer pink manicure this autumn has its own subtle beauty which will look great for the whole season.

There’s something so classy about a pink mani, it oozes femininity and at the same time looks very professional. Its neutral tone means that it is very low maintenance as not only will it go with your whole wardrobe  but any chips in the polish will be barely visible.  Nude, soft pinks are all about emphasizing your own natural beauty keeping your look organic and fresh.

In order to achieve this look, my recommendation is Chane’s Ballerina.  Buying this nail polish, I was taken by its sleek  packaging with its heavy black lid which feels indestructible.  Also, there’s something about having a Chanel nail polish which is just so intrinsically right, feminine yet powerful.

This polish in one coat gives a beauty delicate shine to your nails with the slightest of nude pink tones bringing out the natural colour of your nails.  A second coat creates a more solid nude pink.

Creamy and non-streaky, you can’t go wrong in this colour.  It can be applied in a flash because its natural colour means its nearly impossible to see any mistakes or unevenness.

So, what are you waiting for? Go ahead and pamper yourself with this beautiful Chanel pink manicure.

Using eyeliner to create a cat-eyed look

If there is one makeup look which always looks chic and never goes out of fashion, it’s cat eyes.

It’s created by the flick of liquid eyeliner on the upper lashes, and can be worn on its own, making it one of the quickest ‘looks’  or with full makeup. Of course, it always looks great with red lipstick, which creates an amazingly elegant and sultry look.

Choosing the right eyeliner

1.)  Do not use a pencil – it does not create a smooth and slick flick which can be built up (pencil is to be smudged, e.g. smokey eyes)

2.) Do not use powder and pointed brush – it can smudge and will not be ‘black black’ like you can achieve with liquid.

3.)So your options are: liquid eyeliner, felt tip pen style eye-liner, creamy eyeliner.

Liquid eyeliner

This is a safe bet as they are relatively easy to use and easily removable if you make a mistake. The best thing is, you  can even use a cheap brand like L’Oreal Paris Lineur Intense as it creates the same effect as the more expensive brands.


Felt tip pen liner

This is easier to use as it’s like drawing with a real felt tip pen.  The only negatives is that they dry out quickly so have a shelf life of about a month.  Also, be careful to wait for your primer/foundation to dry otherwise the brush becomes discolored and will no longer be black like it was before.

Creamy Eyeliner

This  is much less readily available, but some makeup brands like Urban Decay’s Ink do stock it.  The benefits are that it can be much more precise as you can use an angled brush.  The negative is that if you smudge it it is difficult to remove as it is oil based.

Creating the cat eyed look

Now you’ve got the right eyeliner, comes the tricky part – applying. Try not to dip your eyeliner into more product during the application as uneven amounts of product will be loaded onto the applicator.

1) Apply either directly onto makeup free  or foundation covered eyelids.

2) Close one eye and with a finger gently pull the eyelid taught and in a slightly cat-eyed direction upwards.

3) Wait for your hand to steady and starting from the middle of your eyelid, draw a very thin line along your eye-line as close to your lashes as possible and as straight as possible until you reach the last of your lashes.

4.) Do the same to the other eye so they match

5.) Now, without pulling your eyelid taught, draw an upwards flick at the same angle that your bottom eyelid is going.  This creates the most natural, beautiful curve.

If you’re lucky, you should be looking like this: (we can dream, right?)

5.) Fill in the eyeliner from your inner eyelid until the middle where you had started. (This is important to do last as by now your your applicator is drying out and will not load too much product onto your inner eye.)

6) Check your two eyes are both equal.  If you like you can slightly thicken the eyeliner on your outer eye – keeping the line smooth and not thickening the flick or eyeliner on the inner eye.

Last of all, this look should be finished with a red lipstick.  Now, hold your head up high and enjoy your new cat-eyes look!

What is Primer and how do I use it?

Many women have yet to discover what exactly is ‘primer’.  Makeup primer is a cream or liquid which sets the canvas for your foundation.

Its benefits include, but are not limited to: smoothing your skin, minimising pores, illuminating and covering wrinkles and uneven skin tone.  But, most importantly it keeps your makeup together for longer by stopping your skin absorbing all of your hard work.  This is because primers contain polymers which form a bond with your cosmetics and thus prevent your makeup be absorbed or rubbed off so readily.

So, if you’re a busy woman always on the go, primer is a great investment as it will be your makeup in place all day, and will be you look even more radiant,

Remember that before buying a primer try a small amount on your jaw first and see how it feels later in the day.  If your still impressed, pop back the next day.

Here are some hints and tips on what to look for in a primer depending on your skin needs.

The different types of primer

For covering uneven skin tone

For those of you with blotchy, red and irregular skin tone then  it is best to get a coloured primer which will stop your uneven patches shining through your foundation.

Hint – If you’ve got lovely blemish free skin, which is just a bit blotchy there is no point covering it in industrial war paint – aka heavy coverage foundation. Just put a dash of tinted primer underneath your foundation and you’ll have that sheer, airbrushed look you’ve always been dreaming for.

I love Stila’s One step colour correcter. This triple swirled helix serum covers uneven skin tones whilst simultaneously brightening and and smoothing.  It’s also made of a mineral complex which will balance you skins natural oils thus preventing break outs.

Illuminating

For those of you who wanted an illuminated, fresh and dewy hint to your makeup then an illuminating primer is just what you need.  It works by providing a natural glow to your face by subtly illuminating your foundation from underneath.

I am, and always will be a fan of Benefit’s skin products which seem to just work. (keep away from their eyeshadows and lipsticks though because they definitely don’t.)  They have  two fab illuminating primers, “That Gal” and ” Girl wears pearl”.

Both can be worn alone or under foundation as illuminate and smoothen beautifully, as well as leaving a lovely matt effect.   The two colours are also gorgeous, two different shades of peach – with “That Gal” having a slightly golder finish.  They also do a great job of keeping your makeup in place.

Matt – pore minimizing and wrinkle smoothing

For those of you wanting a matt effect this type of primer focuses primarily on keeping your skin super silky by smoothing out wrinkles and minimizing pores. They may not brighten much, but hey, who cares if it gives you a perfect makeup canvas whilst making you look five years younger!

I’ve got two recommendations here:

1.) L’oreal – studio secrets magic perfecting base – this primer is, too say the least, a god send. Not only is it available at any Boots and Superdrug it really does cover up wrinkles and pores, calms down redness and leaves your skin velvety.

Application –  It works best by first applying a light moisturizer 5 minutes beforehand, then lightly dabbing this primer on top with your fingers.  Wait another 5 minutes for it to absorb before going ahead with the rest of your make up.  It may seem long winded, but girls, if it covers your wrinkles are really going to complain!?

2.) MACs Prep + Prime SPF50

Great for oily/combination skin, this primer has a great mattifying effect whilst protecting you from the sun. Unlike the L’oreal Primer, this is made to be worn on its own without moisturizer. So, though it costs a little more, it means it can be worn immediately.  This primer will keep you looking fresh all day and has a gorgeous fresh smell to it.

So girls – be brave and look into the world of primers.  You never know, this little known product may become an essential makeup mag must-have.  It really is a product which will make you feel like you, but on a really good day!

Enjoy!!
Get rid of frizz! Enjoy smooth and silky hair!

I’ve tried every shampoo and conditioner under the sun, from the ones found in the supermarket to high-end salon  products and serums.  All in an attempt to contain my raging hair with its fried split ends…!

Although I was previously a die-hard Aussie user ( 90% because of its amazing smell) I have since been converted to…….you’ll never have guessed it, TRESseme!

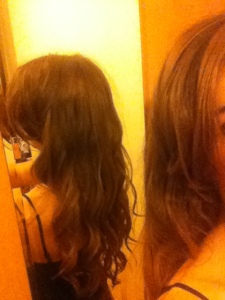
I have long dark brown hair, which is naturally very thick and coarse.  Under the heat of GHDs it can become just  about manageable but leaving it naturally to dry is an absolute no-no.  It kinks and frizzes and no type of conditioner can really tame it.

The closest I’ve found to making it silky is TRESemme’s smooth and silky with vitamin H and silk proteins.  It smoothens and conditions without weighing my hair down.  Its also got a big easy-to-use pump bottle.  It’s also got a gorgeous fresh smell to it.

It still doesn’t get the kinks out of my hair, but at least the frizz is gone.  I also love that fact it doesn’t cost a  fortune…especially because I get through a good 500mls every month! I never knew it took so little to have gorgeous, manageable and affordable hair.

Have you guys tried it? What do you reckon?

Orgasm, Deep Throat and Sin, NARS’s products that will make you blush!

Its not just the racey names of NARS’s collection of 27 blushes which gets people talking, but their astonishing array of colours.  The blushes are all highly pigmentated so there is no need for touch-ups during the day.  They blend flawlessly and suit every skin tone.

All come packaged in a slim matt finish flat case, which is shaped perfectly so that product can be used until the best of all is shaped so that your blush can be loaded up,  and the product can be used the very end (unlike Benefit’s beautifully but impractically packaged blushes) easily until the very end.

Here are my top three favorite colours especially chosen for pale, olive and darker complexions.

SIN by NARS

Complexion reccomendation – for chestnut / blonde girls with light skin and blue / gray eyes. This blush is perfect for girls with cool colour tones  in their complexion.

Sin is best suited towards the pale / cool skin tone range, this blush comes in a delicious berry tone with a golden shimmer.  The plum/berry glow transforms lighten skin tones providing contrast and adding warmth.  Don’t be put off by the mauvish colour in the pan, once on your skin it becomes lighter and more pink hued.

The nature of the hues in this blush add a sophisticated look to your makeup, and the slight shimmer will add a glow to your cheeks. This blusher is best teemed with grey smokey eyes, keeping the tones of your make up cool.  Another positive is that like ‘Deep Throat’ the shimmer is finely milled so won’t make you look too sparkley.

The negative- use a light hand with this blush, otherwise you may risk purple tones – a little product goes a long way!

 MATA HARI by NARS
Complexion Recommendation – for girls with a medium complexion.  Universally perfect for blondes, brunettes and red heads!  Also great for Asian girls.
MATA HARA is a striking, bright candy  pink which though looks intimidating gives a nice health and awake flush of rosey pink.  This shade is easier to wear than ‘Desire’ which can sometimes look too 80’s.
This vibrant and fresh blush gives a very beautiful natural flush to the cheeks and has something girly about it which I just love. It blends best into warm skin tones as it blends in to give a healthy glow.  Unlike most of the NARS blushers, this blush is shimmer free so can be built up as much as you like or accented with a blush highlighter.
The negative – stay away if you have very pale skin as it may wash you out.

DEEP THROAT by NARS

Complexion Recommendation – for brunette girls with dark eyes and skin, the golden hues and subtle pink with perfectly suit your complexion.

Deep Throat is suited towards slightly darker, olive skin tones and is a pretty peachey pink with subtle shimmer. This blusher brightens the face without it looking artificial and gives a natural glow to your skin.

The subtle shimmer adds luminosity to the skin without you ending up looking like a disco ball, even if you load the product up on your brush.  This beats the accoladed ‘Orgasm’ as though similar in colour it is much sheerer, and without so much shimmer, this providing a much more natural highlight

A definite must for olive skinned ladies who want to enhance their natural beauty by adding a peachy glow to the cheeks with this naturally toned blush.

Negatives – the embarrassing name!

Application – 

Thanks to the shape of the pan, any brush can access the powder.  Though, be sure to stay away from large brown brushes, otherwise you won’t achieve the accuracy needed to highlight your cheekbones.

I would reccomend Bobbi Brown’s Blush Brush which works wonders with NARS blushes as it is absolutely goof-proof and applies blush smoothly and precisely with hardly any  fall out.  It has a luxuriously soft and natural feel that glides the product onto your cheeks.

So go ahead, try out one of these vibrant and naughty shades! They don’t disappoint!

Pretty pink pout this Autumn!

Autumns coming and what I love most about this month is its intense colour pallet. Yes, pulling off those deep plums and mauves can be a bit daunting, so if you’re not quite ready why not opt for a daring shocking pink which just oozes confidence and feminineness.

YSL have a gorgeous new range, which is just bursting with different shades of pink.   Not only are they long lasting but all have a delicious fruity flavours.   They can be worn alone, or, for a more striking look on top of lipstick.  Remember to choose a lipstick which is a slightly paler shade than the gloss otherwise when the gloss wears off the contrasting colour difference will be too obvious.

What to team with a pretty pink pout? With such a strong beauty statement as a pink pout, keep the rest of your make up minimal with perhaps just a flick of mascara to open up your eyes.

A lip primer works wonders for keeping a daring lip gloss in place and prolonging its wear. Mac’s Prep and Prime  not only improves the look of lip products but lightly moisturizes lips preventing them from drying out and chapping.